Taro root and leafy greens
Here is a delicious way to use taro in your kitchen. This taro burger is crispy, filling and full of flavor. It’s a farm favorite.
We grow dryland taro (kalo) in and around our kitchen garden. It is a plant that produces a starchy corm or tuber that must be cooked because it contains high amounts of calcium oxalate. The leafy greens (lūʻau) can also be eaten after cooking.
In our garden there are patches of it where we purposely planted it and there are places where it just happens to grow from some tossed aside corms. We get a fair amount of rainfall, so it grows well in semi-shaded areas like under a mango tree.

Lau lau-ti leaf wrapped taro, lūʻau, fish, pork, and sweet potatoes
Taro or kalo is deeply rooted to the Hawaiian culture and is an ancestor of the Hawaiian people.
The leaf of the taro plant is eaten in a popular dish known as lau lau, which I also enjoy making.
The roots are used in other traditional foods prepared by Hawaiians such as poi. Poi is cooked taro that is pounded into a smooth paste and then fermented.
Poi is an essential ingredient in our taro burger recipe. To make this recipe you will need to prepare your own poi or if you live in Hawaii you can purchase it through locally grown sources.

Poi, pounded taro left to ferment
First, I dig up the large roots and clean them of small corms, roots, dirt and cut the leafy green tops off. I like to pressure cook my taro roots because they take a considerable amount of time to cook. I place a steam basket in my pressure cooker and if possible, try to leave my taro whole, including the skin, while it cooks. It can take anywhere from 20 to 45 minutes to cook. I often check, add more water and continue cooking.
After cooking, I remove the skin and mash with a taro pounder. You can put it in a food processor but it doesn’t come out as nice as when you pound it manually–this does take a considerable amount of time. The goal is to make it smooth and have little to no lumps. I add small amounts of water to make the paste smooth and add 2 tablespoons of whey to help with the fermentation.
Place the bowl on the counter with a towel over it for approximately three days. A fine white mold will grow on it and you can stir it in every day if you like. I like my poi slightly sour so I taste it and decide when it’s done enough for me.

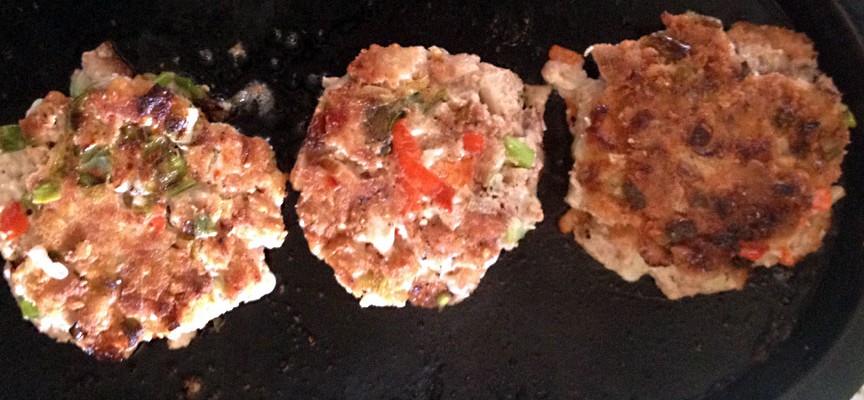
browning and cooking the taro burgers
If you’ve made enough taro roots you will have enough for your poi and the burgers. If not, you can cook some more later when the poi is finished being fermented. Cube some cooked taro root when you are ready to make the burgers.
In a bowl, take your cubed taro and mix in enough poi so that burgers can be formed and stay together. I also like to mix in some salt, pepper, chopped green onions and medium-hot peppers from my garden.
In a cast iron skillet, heat up some oil. I use rendered beef fat from local grass-fed beef. I prefer animal fat to vegetable or nut fats because of their higher smoke point and I think they taste better. I’ve also used coconut oil for vegetarian friends.
Fry your burgers until they have a crispy outer crust. You can serve them up with hamburger buns or on top of leafy greens.
This is a delicious way to serve taro. I hope you enjoy it as much as we do!
Taro Burgers
Ingredients:
- cubed cooked taro
- poi
- chopped green onion
- chopped peppers
- salt and pepper
Mix together into patties and fry until crispy brown on both sides. Below are some recent taro burgers along with garden fresh salads.


Pingback: How to cook taro root using a pressure cooker • Katie's Tropical Kitchen
Where can I get this taro burger